Table of Contents
Tired of flimsy resistance bands promising a "killer chest" while you're stuck at home? Let's be real, building a solid chest often feels impossible without racks of heavy iron or dedicated machines. But what if you could tap into one of the most brutal and effective bodyweight movements out there, right from your living room? We're talking about chest dips. These aren't just some random exercise; they hit your lower chest, shoulders, and triceps with serious intensity, demanding real work from your muscles. You might think you need a bulky dip station, but a surprisingly effective chest dips workout at home is more achievable than you imagine.
What Exactly Are Chest Dips (and Why Do Them at Home)?
Breaking Down the Chest Dip
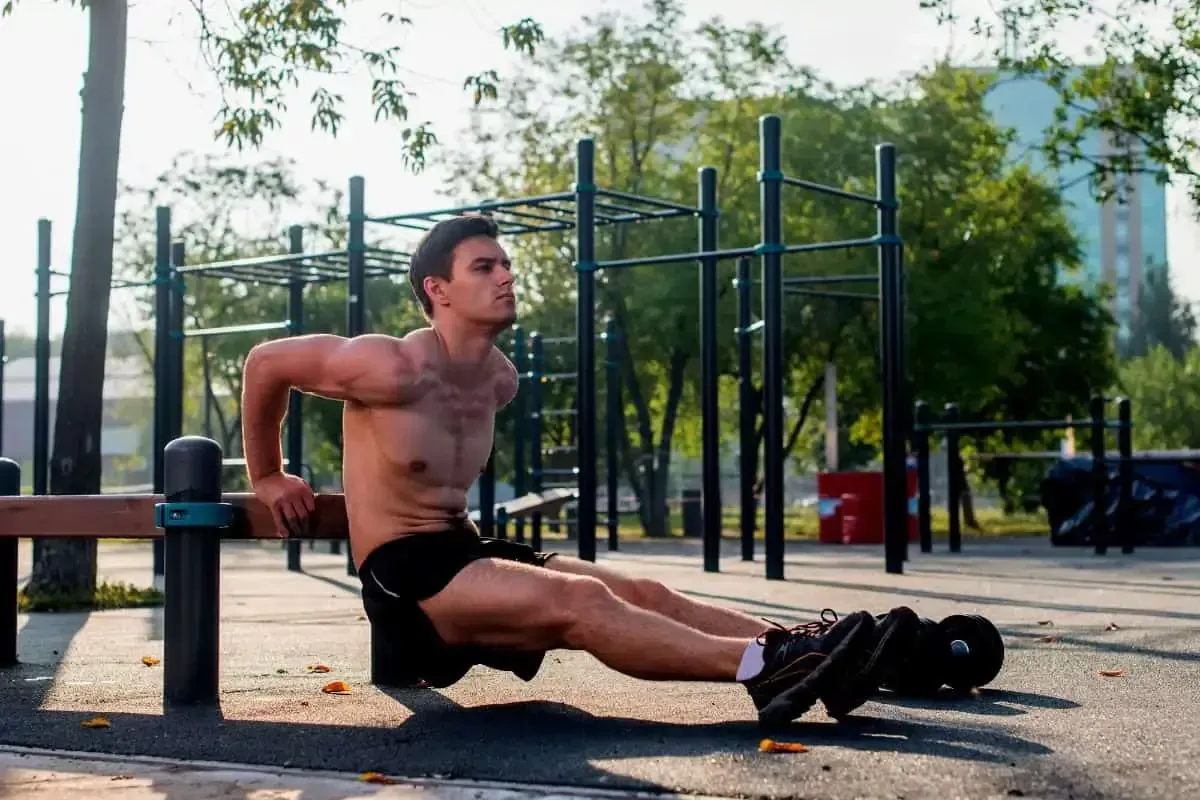
let's talk about the chest dip. Forget the fluff and the fancy machines for a second. A chest dip is a fundamental bodyweight exercise, a raw test of upper body strength. You're essentially lowering your entire body between two parallel bars or sturdy surfaces, letting gravity do its worst while your chest, shoulders, and triceps fight back. It's a compound movement, meaning it hits multiple muscle groups simultaneously, making it incredibly efficient. Specifically, when you lean forward slightly and keep your elbows out a bit, you hammer the lower and outer parts of your chest. Maintain a more upright posture and keep your elbows tucked, and you shift more focus to the triceps. It's a versatile beast, and figuring out a solid chest dips workout at home is a game-changer for anyone serious about building functional strength without needing a gym.
Why Bother Doing Them at Home?
Look, the obvious answer is convenience. Life gets hectic. Traffic, work, that weird smell at the gym – sometimes just getting there feels like a workout itself. Being able to knock out a potent chest dips workout at home removes those barriers. Consistency is king in fitness, and having the ability to train whenever you have a spare 15 minutes means fewer missed sessions. Plus, bodyweight training forces you to master controlling your own mass, which translates well into real-world strength. You're not just pushing a stack of plates; you're manipulating your entire body through space. And let's be honest, there's a certain satisfaction in building serious strength with minimal equipment.
- Convenience: Train anytime, no travel required.
- Cost-Effective: Avoid gym fees.
- Functional Strength: Master controlling your own bodyweight.
- Consistency: Easier to stick to a routine.
- Versatility: Hits chest, shoulders, and triceps effectively.
How to Nail the Proper Form for Chest Dips at Home

How to Nail the Proper Form for Chest Dips at Home
Setting Up and Starting the Descent Right
Alright, let's get down to the nitty-gritty of actually doing these things right. Forget that shaky setup you saw on some viral fail video. Whether you're using parallel bars, sturdy chairs, or a kitchen counter (use your judgment here, folks – safety first, dignity second), the starting position is key for your chest dips workout at home. Grip your chosen surface with hands just outside shoulder-width. Lift your feet off the ground and hang with arms fully extended, but don't lock your elbows out completely. Now, for that chest focus: lean slightly forward from the waist. This angle is crucial. As you begin to lower yourself, control the movement. Don't just drop. Think about pulling your shoulder blades down and back. Your elbows should track slightly outward, but keep them somewhat tucked – letting them flare out wide is a fast track to shoulder pain and shifts the focus away from your chest. Lower until your shoulders are just below your elbows, or until your forearms are roughly parallel to the ground. Going deeper than that often puts unnecessary stress on your shoulder joint without much added benefit for the chest.
Hitting the Bottom and Driving Back Up
At the bottom of the dip, you should feel a stretch in your chest. Maintain that slight forward lean you established at the start. This isn't a triceps dip where you stay bolt upright; you want your chest leading the way. From this stretched position, initiate the upward movement by driving through your hands. Imagine pushing the bars (or chairs, or whatever) away from you as you extend your arms. Keep that chest lean throughout the ascent. Don't rush it; control is everything. Power up until your arms are nearly straight again, but again, avoid hyperextending your elbows at the top. Focus on squeezing your chest muscles as you reach the peak of the movement. Mastering this controlled descent and powerful ascent is the secret sauce to making your chest dips workout at home truly effective for building muscle and strength, not just surviving the movement.
- Lean forward to target the chest.
- Keep elbows slightly tucked, not flared wide.
- Lower until shoulders are just below elbows.
- Control both the descent and ascent.
- Avoid locking out elbows at the top.
No Dip Station? Smart Alternatives for Your Chest Dips Workout at Home
No Dip Station? Smart Alternatives for Your Chest Dips Workout at Home
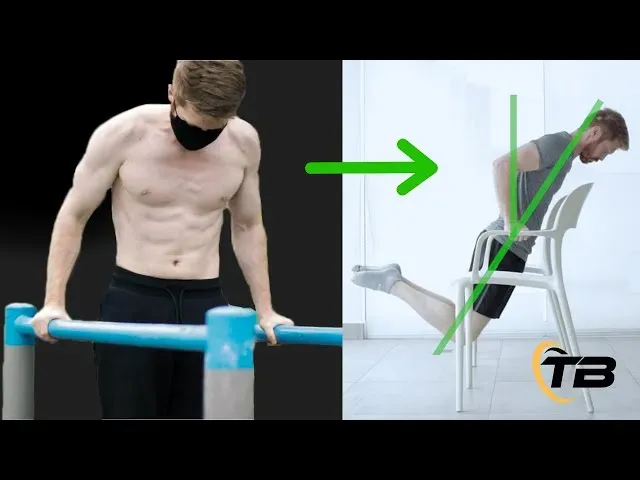
Chair Dips: The Go-To Backup Plan
so maybe you don't have a shiny power tower sitting in your living room. Most people don't. But chances are, you own two reasonably sturdy chairs. This is your most accessible route to a chest dips workout at home. Place two chairs back-to-back, or slightly apart depending on your grip preference, ensuring they are stable and won't slide. Position yourself between them, gripping the edges with your hands. Lift your feet off the floor. If this is too challenging, keep your feet on the ground with knees bent, using them for assistance. Lower your body between the chairs, maintaining that crucial forward lean to target your chest. Push back up. It might feel a little less stable than a dedicated station, so go slow and controlled. This setup is fantastic for beginners or for getting in volume when a full dip is tough.
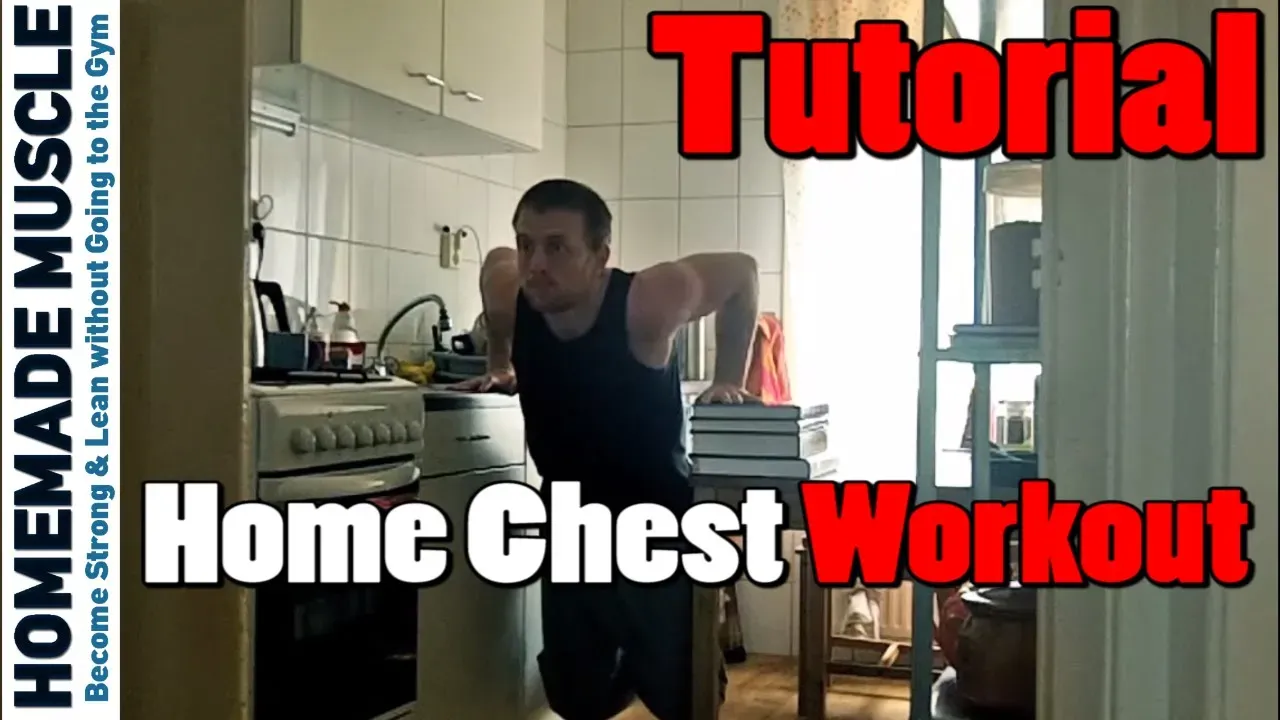
Countertops and Parallel Bars: Stepping Up Your Setup
If you have a robust kitchen counter or even a sturdy railing that runs parallel to a wall, you might have another option for your chest dips workout at home. A countertop allows for a wider grip if needed, and its fixed nature offers more stability than chairs. Just make absolutely sure it can handle your body weight without budging or breaking – nobody wants a kitchen renovation mid-workout. Some homes might even have parallel railings on stairs or decks that are high enough off the ground to allow for a full range of motion. These fixed structures often feel closer to a gym dip station and can handle more weight, making them suitable for adding resistance if you get strong enough.
Home Alternative | Pros | Cons |
|---|---|---|
Sturdy Chairs | Accessible, good for beginners | Less stable, limited depth for some |
Kitchen Counter | Stable, fixed width | Requires very sturdy counter, potential height issues |
Parallel Railings | Stable, good depth potential | Not common in all homes, height/width might be fixed |
Assisted Variations and Creative Solutions
Still struggling with the full movement, even with chairs? Don't bail on the chest dips workout at home concept just yet. You can use resistance bands looped around the chair handles or bars and under your knees or feet to provide assistance on the way up. This helps you build the necessary strength gradually. Another angle is using a single sturdy surface (like a high bench or sturdy coffee table) for bench dips, which primarily hit the triceps but can be adapted slightly with a forward lean to engage the chest more. While not a direct replacement, it works the same movement pattern. Get creative, but prioritize safety above all else. A little ingenuity goes a long way when you're building strength at home.
Integrating Chest Dips into Your AtHome Workout Routine
Integrating Chest Dips into Your AtHome Workout Routine
Fitting Dips into Your Training Schedule
So, you've got the setup figured out, whether it's chairs, a counter, or some clever railing system. Now, where do these beastly chest dips fit into your overall training plan for a killer chest dips workout at home? Think of dips as a compound movement powerhouse, similar to a bench press but using your body weight. This means they can serve as a primary exercise on a chest day, a push day (where you work chest, shoulders, and triceps), or even as part of an upper body or full-body routine. Don't just tack them on randomly; give them the respect they deserve. You can place them early in your workout after a solid warm-up when you're fresh and strong, aiming for quality reps and sets. As you get stronger, you might increase the number of sets or reps, or if you're feeling particularly ambitious and have a secure setup, you could even explore adding weight using a backpack loaded with books or water bottles – just ensure your improvised dip station can handle it!
Common Mistakes and How to Fix Your Chest Dips at Home
Common Mistakes and How to Fix Your Chest Dips at Home
Cutting the Range of Motion Short
Alright, so you've found your setup and you're ready to dip. One of the most frequent screw-ups I see, especially with a chest dips workout at home where the setup might not be ideal, is short-changing the range of motion. People just bob up and down a few inches, barely engaging the chest. You're leaving gains on the table, plain and simple. Lowering your body until your shoulders are at least level with your elbows, if not slightly below, is crucial for hitting the chest fibers effectively and getting that deep stretch that signals muscle growth. If you can't get that deep, it means you're likely not strong enough for full dips yet. Don't fake it.
Flaring Elbows and Losing the Forward Lean
Another classic blunder that turns your chest dip into a shoulder-wrecking triceps exercise (or worse, just painful) is letting your elbows shoot straight out to the sides like chicken wings. This puts massive stress on your shoulder joint and takes the emphasis off the chest. Remember that forward lean? It's your best friend for a proper chest dips workout at home. Maintain that slight angle from your hips, and keep your elbows tracking mostly backward, just slightly out from your body. Think controlled descent, not collapsing. If you find yourself losing the lean or flaring the elbows, your core might be weak, or you might be trying to go too deep too soon.
- Mistake: Elbows flaring wide. Fix: Tuck elbows slightly, track backward.
- Mistake: No forward lean. Fix: Hinge slightly at the hips, keep chest leading.
- Mistake: Rushing reps. Fix: Control descent (2-3 seconds), controlled ascent.
- Mistake: Not going deep enough. Fix: Aim for shoulders below elbows; use assistance if needed.
Using Momentum and Bouncing
Look, nobody's impressed by you swinging wildly or bouncing out of the bottom position. That's not strength; that's desperation. A proper chest dips workout at home demands control. Each rep should be deliberate. Lower yourself under control, pause briefly at the bottom to feel the stretch (no bouncing!), and then push back up smoothly. If you have to swing your legs or jerk your body just to get back up, you're lifting too much (or rather, you're not strong enough for your own bodyweight yet). Drop the ego, focus on form, and use assistance methods like chair dips with feet on the floor or resistance bands until you can perform strict, controlled repetitions. Consistency with good form beats sloppy reps every single time.
Wrapping Up Your Home Dip Journey
So there you have it. The idea that you absolutely need a dedicated gym setup for a serious chest dips workout? Pretty much debunked. While a proper dip station is great, it's clear you can get significant work done on your lower chest, shoulders, and triceps using what you already have or some simple, creative solutions. Proper form isn't optional – mastering that lean and controlled movement protects your joints and actually hits the target muscles. Whether you're using sturdy chairs, parallel bars, or even assisted variations, consistency and focus are key. Getting a real chest dips workout at home is less about fancy equipment and more about smart application and making do with your environment. Start incorporating them, pay attention to how your body responds, and build that strength.