Table of Contents
Want a chiseled upper chest but hate the gym? You're in luck! This comprehensive guide is your ticket to building a powerful, defined upper chest—all from the comfort of your home. Forget expensive gym memberships and crowded workout spaces; we'll show you how to achieve incredible results using only your bodyweight. We'll explore the anatomy of your chest muscles, focusing specifically on the upper pectorals, and then dive into five killer exercises perfect for targeting that area. You'll learn proper form, modifications for different fitness levels, and how to build a personalized chest workout at home for upper chest routine that fits your schedule and goals. Whether you're a beginner or a seasoned fitness enthusiast, we'll provide progressions and variations to keep your workouts challenging and effective. Get ready to transform your physique and unlock a stronger, more impressive upper chest—all without ever leaving your house! This isn't just another workout plan; it's your blueprint for success. Let's get started!
Mastering the Upper Chest: Anatomy and Targeting Techniques
Mastering the Upper Chest: Anatomy and Targeting Techniques
Understanding the Pectoralis Major
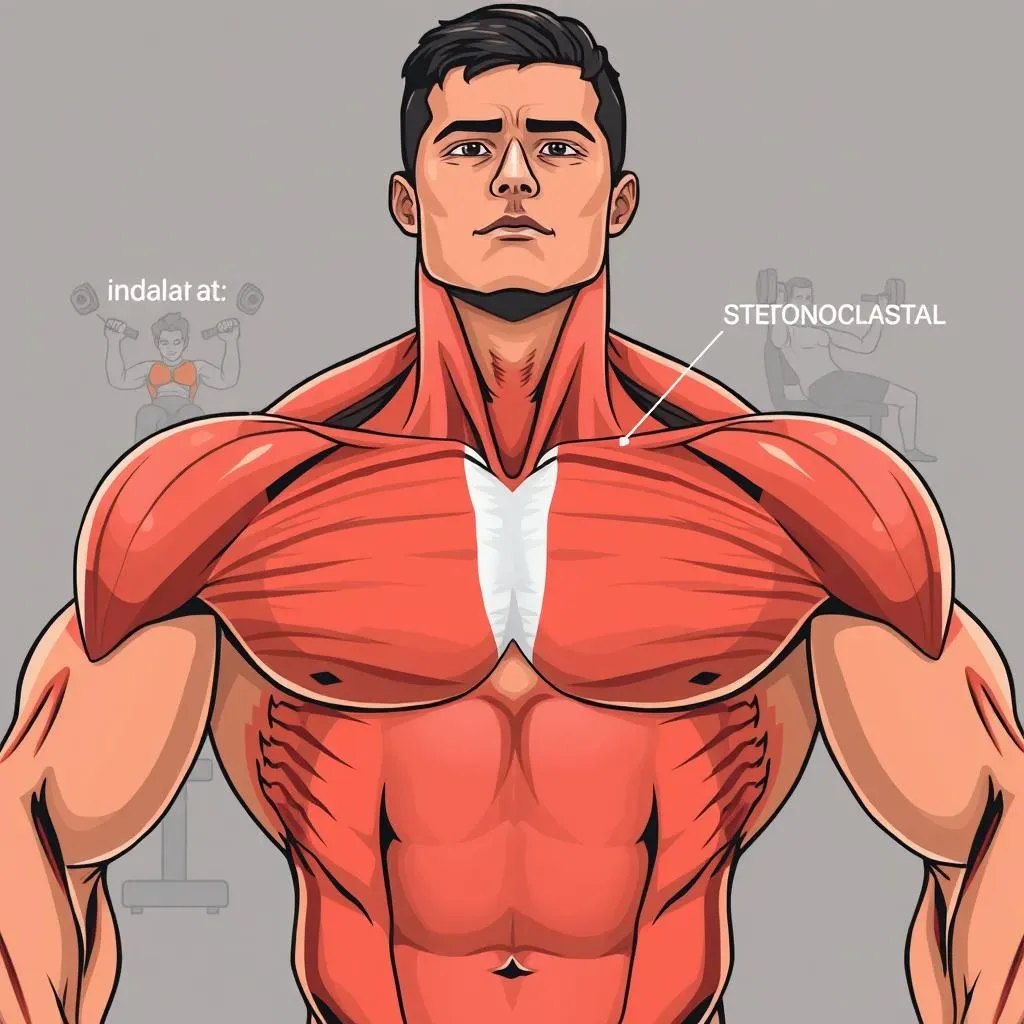
Let's talk pecs! Your chest isn't one big muscle; it's actually made up of several, with the main player being the pectoralis major. Think of it as a powerful fan, spanning across your chest from your collarbone down to your ribs. This big muscle is responsible for most of the movement and shape of your chest. But here's the key: the pectoralis major isn't uniform. It has different sections, and understanding these sections is crucial for sculpting that impressive upper chest.
The upper portion, or clavicular head, originates from your collarbone. This is the part we're really focusing on today! It's responsible for that coveted upper chest definition. The lower, sternocostal head, starts from your sternum (breastbone) and ribs, contributing to the overall chest size but less to the upper area. By understanding these distinct sections, you can choose exercises that specifically target the upper chest fibers, maximizing your results and avoiding wasted effort.
Muscle Section | Origin | Action | Exercise Focus |
|---|---|---|---|
Clavicular Head (Upper Chest) | Collarbone | Shoulder adduction, horizontal flexion | Incline presses, incline flyes |
Sternocostal Head (Lower Chest) | Sternum and ribs | Shoulder adduction, horizontal flexion | Flat presses, decline presses |
Targeting the Upper Chest Fibers
Now that we know the anatomy, how do we *actually* target that upper chest? The secret lies in the angle of your exercises. Think of it like this: you want to "hit" the upper fibers of the pecs, which means you need to position your body so that those fibers are working the hardest. This is where incline exercises come into play. Incline exercises, those performed on an incline bench (or in our case, creatively using household items!), change the angle of your torso, shortening the distance the upper chest muscles need to contract during the exercise. This increased range of motion allows for superior muscle activation in the upper chest.
For example, a regular push-up works your chest, but an incline push-up (hands elevated on a sturdy surface) shifts the emphasis upwards. Similarly, incline dumbbell presses and flyes are fantastic for isolating the upper chest. The key is to maintain controlled movements and focus on the mind-muscle connection – feeling the burn in your upper pecs throughout the exercise. Remember, it's about quality, not just quantity! A few controlled reps with perfect form are far more effective than many sloppy ones.
- Incline Push-Ups
- Incline Dumbbell Press (using books or a sturdy surface)
- Incline Dumbbell Flyes (using books or a sturdy surface)
Optimizing Your Upper Chest Workouts
Beyond exercise selection, optimizing your workout involves several key factors. First, proper warm-up is crucial. Start with some light cardio and dynamic stretches, such as arm circles and chest stretches, to prepare your muscles and prevent injury. Next, focus on proper form. Don't sacrifice form for more reps; it's better to do fewer reps with perfect form than many with poor form. Remember, quality trumps quantity every time. Finally, progressive overload is key to continued muscle growth. Gradually increase the difficulty of your exercises over time, whether by adding more reps, sets, or variations.
Remember that consistency is key. Just like building a house takes time and effort, building a strong upper chest takes dedication. Stick to your routine, listen to your body, and don't be afraid to adjust as needed. And remember, rest and recovery are just as important as the workout itself. Allow your muscles adequate time to repair and grow between sessions. With the right knowledge, a bit of creativity, and consistent effort, you can definitely achieve that impressive upper chest you've been aiming for, all from the comfort of your own home!
Top 5 Chest Workout at Home for Upper Chest Exercises (No Equipment Needed!)

Top 5 Chest Workout at Home for Upper Chest Exercises (No Equipment Needed!)
Incline Push-Ups: The King of Upper Chest Builders
Let's start with a classic, but with a twist! Regular push-ups are great, but incline push-ups are where the upper chest magic happens. You'll need to find something to elevate your hands—a sturdy chair, a low wall, or even a stack of thick books will work perfectly. The higher your hands, the greater the emphasis on your upper pecs. Keep your body in a straight line from head to heels, and lower yourself until your chest nearly touches the surface. Push back up powerfully, focusing on squeezing your upper chest muscles at the top of the movement. Aim for 3 sets of as many reps as you can manage with good form. Remember, quality over quantity!
The beauty of incline push-ups is their adaptability. Beginners can start with a less steep incline (hands on a slightly raised surface), while more advanced exercisers can increase the challenge by raising their hands higher, or by adding a pause at the bottom of the movement. You can also try different hand placements—closer together for a greater triceps focus, or wider apart to emphasize the chest.
Set | Reps | Rest (seconds) |
|---|---|---|
1 | As many as possible (AMRAP) | 60 |
2 | AMRAP | 60 |
3 | AMRAP | 60 |
Pike Push-Ups: Targeting the Upper Chest with a Unique Angle
Next up, we have pike push-ups, a fantastic variation that really zeroes in on the upper chest. Start by placing your hands shoulder-width apart on the floor, then bring your feet up close to your hands, forming an inverted V-shape with your body. Your body should be almost perpendicular to the floor. This creates a significant incline, placing maximum emphasis on the upper chest. Lower your head towards the floor, bending your elbows, and then push back up, ensuring your body remains straight throughout. Aim for 3 sets of as many reps as you can with perfect form.
Pike push-ups are a more advanced exercise, so if you're a beginner, start with fewer reps and sets. Focus on maintaining good form; it’s more important than the number of repetitions you can do. As you get stronger, you can increase the difficulty by holding a pause at the bottom of the movement or by adding weight (a backpack with books works great!). This exercise is seriously effective at building that upper chest definition.
- Focus on controlled movements.
- Maintain a straight body line.
- Squeeze your upper chest at the top of each rep.
Building Your Upper Chest Workout at Home Routine: A StepbyStep Guide

Building Your Upper Chest Workout at Home Routine: A StepbyStep Guide
Creating Your Personalized Workout Plan
Alright, let's build your killer upper chest routine! First, consider your current fitness level. Are you a beginner, intermediate, or advanced? This will determine the number of sets, reps, and the difficulty of the exercises you choose. Beginners should start with fewer sets and reps, focusing on perfect form, while more experienced individuals can push themselves harder with more challenging variations. A good starting point is a 3-day-a-week routine, with at least one day of rest between workouts to allow your muscles to recover. Remember, you're building a strong foundation, not rushing to the finish line!
Next, choose 2-3 exercises from the previous section that you feel comfortable performing with good form. Don't try to do everything at once! Start with a manageable routine and gradually add more exercises or increase the difficulty as you get stronger. For example, a beginner might start with incline push-ups and pike push-ups, while an intermediate exerciser might add decline push-ups or variations like diamond push-ups. Remember, consistency is key. A short, well-executed workout is far better than a long, sloppy one. Focus on quality over quantity and you'll see fantastic results.
Fitness Level | Sets | Reps | Rest (seconds) |
|---|---|---|---|
Beginner | 2-3 | 8-12 | 60 |
Intermediate | 3-4 | 10-15 | 45 |
Advanced | 4-5 | 12-20 | 30 |
Tracking Your Progress and Making Adjustments
Now, let's talk about tracking your progress. This isn't just about bragging rights; it's about seeing how far you've come and making adjustments to your routine as needed. Keep a workout journal to record your sets, reps, and how you felt during each workout. This will help you identify areas for improvement and prevent plateaus. Notice any patterns? Maybe you're consistently struggling with a certain exercise, or maybe you're not feeling the burn in your upper chest as much as you'd like. This is where you can adjust. For example, if you're struggling with incline push-ups, try a less steep incline, or focus on improving your form. If you're not feeling the burn in your upper chest, try adjusting your hand placement or adding a pause at the bottom of the movement.
Remember, your body is constantly adapting, so your workout routine should adapt with it. As you get stronger, you'll need to progressively overload your muscles by increasing the difficulty of your exercises. This could mean adding more reps, sets, or trying more challenging variations. Don't be afraid to experiment and find what works best for you. The key is to listen to your body, adjust your routine as needed, and stay consistent. With dedication and a smart approach, you'll be amazed at the results you can achieve!
- Keep a workout log
- Track your progress (reps, sets, weight if applicable)
- Adjust your routine based on your progress and how your body feels
- Remember rest and recovery are crucial!
Advanced Chest Workout at Home for Upper Chest: Variations and Progressions
Advanced Chest Workout at Home for Upper Chest: Variations and Progressions
Taking Your Upper Chest to the Next Level: Advanced Variations
So, you've mastered the basics? Fantastic! Now it's time to dial up the intensity and really challenge those upper pecs. We're moving beyond simple incline push-ups and pike push-ups into exercises that demand more strength, stability, and control. Think of this as the "expert" level, where we're not just building muscle, but sculpting a truly impressive physique. This is where the real fun begins! We’re going to introduce variations that increase the difficulty and really target the upper chest muscles, pushing you beyond your comfort zone and accelerating your gains.
One excellent progression is to incorporate plyometrics. Instead of a slow, controlled descent, try explosive movements. For example, with incline push-ups, try adding a jump at the top of each repetition. This adds an extra element of power and engages your fast-twitch muscle fibers, resulting in even greater muscle growth. Another challenge is to add resistance. If you have resistance bands, you can incorporate them into your incline push-ups or pike push-ups to increase the difficulty. If not, try wearing a weighted vest, if you own one. Even a backpack filled with heavy books can add a significant challenge. The key is to find creative ways to increase resistance gradually as your strength improves.
- Plyometric Incline Push-Ups (explosive push-up with a jump at the top)
- Resistance Band Incline Push-Ups
- Weighted Pike Push-Ups (using a weighted vest or backpack)
- Archer Push-Ups (alternating one arm at a time)
Another fantastic way to challenge yourself is to incorporate unilateral exercises, which means working one side of your body at a time. Archer push-ups are a perfect example. Start in a standard push-up position, then shift your weight to one side, extending the other arm out to the side. Lower yourself down, focusing on maintaining stability and control, then push back up. Repeat on the other side. This variation increases the challenge by requiring more stability and strength from your core and supporting muscles. Unilateral exercises also help to address any muscle imbalances you may have, leading to more balanced and symmetrical muscle development.
Finally, remember that proper form is paramount, especially as you progress to more advanced exercises. It's better to do fewer reps with perfect form than many with sloppy form. Focus on feeling the muscles working, and don't hesitate to modify the exercise if you're struggling to maintain good form. It's not about ego; it's about results. By incorporating these advanced variations, consistently pushing your limits, and listening to your body, you'll unlock a whole new level of upper chest development. Get ready to sculpt the chest of your dreams!
Exercise | Description | Focus |
|---|---|---|
Plyometric Incline Push-Ups | Explosive push-up with a jump at the top | Power, fast-twitch muscle fibers |
Resistance Band Incline Push-Ups | Incline push-up with resistance band | Increased resistance, greater muscle activation |
Weighted Pike Push-Ups | Pike push-up with added weight | Increased resistance, greater muscle activation |
Archer Push-Ups | Unilateral push-up, one arm at a time | Stability, core strength, unilateral muscle development |