Table of Contents
Want a chiseled chest without stepping foot in a gym? You've come to the right place! This article is your complete guide to achieving a powerful, sculpted chest using only push-ups – the ultimate bodyweight exercise. Forget expensive gym memberships and complicated equipment; we'll show you how to transform your upper body from the comfort of your own home. We'll break down the fundamentals of perfect push-up form, ensuring you maximize results and avoid injury. Then, get ready to level up your routine with advanced push-up variations designed to target every part of your chest. We'll craft a personalized workout plan tailored to your fitness level, complete with a step-by-step guide to help you track your progress and see real results. This isn't just about building muscle; it's about building a stronger, healthier you. So, ditch the excuses and embrace the challenge. Your dream chest workout, using only push-ups, awaits! Get ready to conquer your fitness goals with our definitive guide to chest workout at home with push-ups.
Mastering the Perfect PushUp: Form and Technique

Mastering the Perfect PushUp: Form and Technique
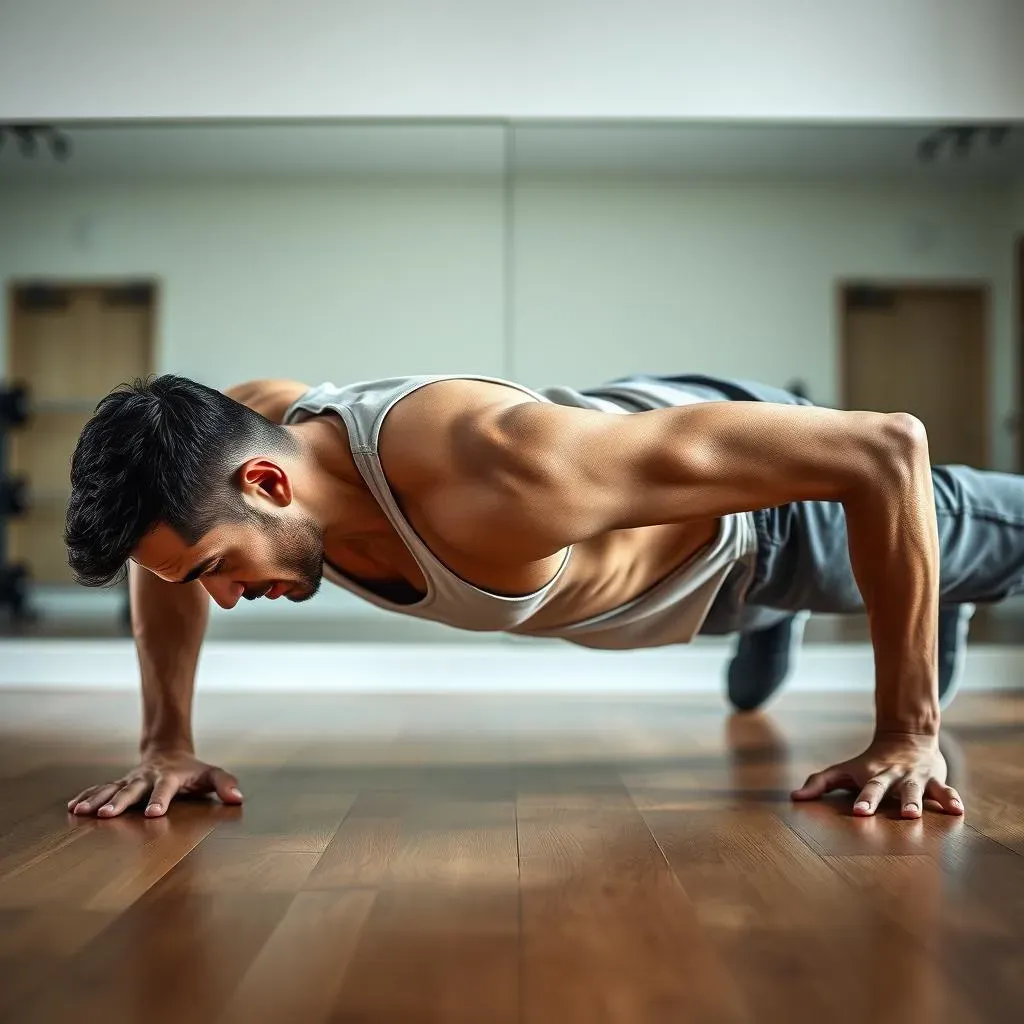
The Foundation: Perfect Plank Position
Think of your body as a perfectly straight line from head to heels. Imagine a plank of wood—that's the goal! Your core should be engaged, your glutes squeezed, and your shoulders pulled down and away from your ears. Don't let your hips sag or your butt stick up in the air; that’s cheating and you won't get the full benefit. This solid base is crucial for targeting your chest effectively and preventing injuries. A wobbly plank means a wobbly push-up, and that's no fun.
Remember, proper form is key! If you're struggling to maintain a straight line, start with easier variations, like knee push-ups, and gradually work your way up. Check out our guide to beginner chest workouts for some helpful tips. Consistency is more important than intensity, especially when you're learning.
Body Part | Proper Position | Common Mistake |
|---|---|---|
Core | Engaged, tight | Relaxed, sagging |
Hips | Straight line with back | Sagging or raised |
Shoulders | Down and back | Rounded, hunched |
Elbow Alignment: The Secret to Chest Activation
This is where many people go wrong. Instead of letting your elbows splay out to the sides, actively try to point your elbow pits forward. Imagine you're trying to touch your thumbs together while you lower. This subtle adjustment dramatically shifts the focus to your chest muscles. You'll feel the burn in the right places, trust me!
By keeping your elbows tucked in, you're preventing your shoulders from taking over the work. It’s a small change, but it makes a huge difference in terms of chest activation and injury prevention. If you're still struggling, try watching a video of someone demonstrating the perfect form. Sometimes seeing it in action really helps!
- Focus on pointing elbow pits forward
- Avoid letting elbows flare out to the sides
- Maintain this throughout the entire movement
The Descent: Lowering for Maximum Gains
Don't just flop down! A controlled descent is essential for maximizing muscle engagement and preventing injuries. Lower yourself slowly, feeling the stretch in your chest muscles. Aim to lower your chest until it’s almost touching the ground (or as close as your flexibility allows). This slow, controlled movement is where the real magic happens.
Many people rush through the lowering portion of the push-up, missing out on the opportunity to fully engage their chest muscles. Take your time, feel the stretch, and control the movement. If you're finding it difficult to control your descent, try pausing at the bottom for a second or two before pushing back up. This added time under tension will increase the challenge and maximize your results. For more advanced techniques, check out our guide to the best chest workouts at home.
Beyond the Basic PushUp: Variations for a Killer Chest Workout

Beyond the Basic PushUp: Variations for a Killer Chest Workout
Wider is Better (for Chest Focus!): Wide Push-Ups
Ready to really feel the burn in your pecs? Try wide push-ups! Simply widen your hand placement beyond shoulder-width. This variation emphasizes the outer chest muscles, giving you a broader, more defined look. Remember to maintain that perfect plank form—no sagging hips! As you get stronger, you can increase the width even further for an even greater challenge.
Don't be afraid to experiment with different hand placements to find what works best for you. Some people find that a slightly wider-than-shoulder-width stance provides the optimal balance between challenge and comfort. And if you're struggling with regular wide push-ups, you can always start with a slightly narrower stance and gradually increase the width as you get stronger. For a more comprehensive workout, consider incorporating other exercises, especially back exercises to maintain good posture! Check out our guide to chest workouts for men for more ideas.
- Hand placement wider than shoulder-width
- Focus on controlled movements
- Gradually increase width as you get stronger
Incline Your Way to Upper Chest Gains: Incline Push-Ups
Want to target the often-neglected upper chest? Incline push-ups are your answer! Place your hands on an elevated surface—a sturdy chair, a bench, or even a wall will do. The higher the surface, the easier the push-up will be, allowing you to focus on form and gradually increase the difficulty. This variation is fantastic for building that impressive upper chest definition.
Experiment with different incline angles to find what suits your strength level. A lower incline will provide a greater challenge, while a higher incline allows you to perform more reps. Remember to maintain perfect form and a controlled tempo, focusing on squeezing your chest muscles at the top of each repetition. You can find even more effective variations in our article on the best chest workouts at home for incredible results.
Incline Height | Chest Emphasis | Difficulty |
|---|---|---|
Low (e.g., coffee table) | Upper chest | High |
Medium (e.g., chair) | Upper chest | Medium |
High (e.g., wall) | Upper chest | Low |
Creating Your Home Chest Workout Plan: A StepbyStep Guide
Creating Your Home Chest Workout Plan: A StepbyStep Guide
Building Your Routine: Frequency and Intensity
So, you've mastered the perfect push-up and explored some killer variations. Now, let's build a workout plan that's both effective and sustainable. How often should you train your chest? Aim for 2-3 sessions per week, allowing at least one day of rest in between to let those muscles recover and rebuild. Overtraining is a real thing, and it can actually hinder your progress. Remember, consistency is key! It's better to do a few sets of perfect push-ups than many sloppy ones.
When it comes to intensity, start with a number of push-ups you can comfortably complete with good form. As you get stronger, gradually increase the number of reps, sets, or the difficulty of the variations. Don't be afraid to challenge yourself, but always prioritize proper technique over sheer quantity. A few perfect push-ups are far better than many sloppy ones, especially when you're starting out. Check out our guide for women's chest workouts at home for more tailored advice.
- Frequency: 2-3 times per week
- Rest: At least one day between sessions
- Intensity: Gradually increase reps and sets
- Prioritize form over quantity
Sample Workout Schedule: A Beginner's Guide
Let's create a sample workout schedule perfect for beginners. Remember, this is just a starting point—adjust it based on your individual fitness level and progress. Always listen to your body and don't push yourself too hard, especially in the beginning. Consistency is key. Start slowly, build gradually, and you'll be amazed at what you can achieve!
This schedule focuses on building a solid foundation. As you get stronger, you can add more sets, reps, or more challenging variations. Remember to include rest days to allow your muscles to recover. Proper rest is just as crucial as the workout itself. For more advanced routines, check out our guide to chest workouts at home with no equipment.
Day | Workout | Sets | Reps |
|---|---|---|---|
Monday | Standard Push-ups | 3 | As many as possible (AMRAP) with good form |
Wednesday | Incline Push-ups | 3 | AMRAP with good form |
Friday | Wide Push-ups | 3 | AMRAP with good form |
Advanced PushUp Techniques and Progressions for Continued Growth
Advanced PushUp Techniques and Progressions for Continued Growth
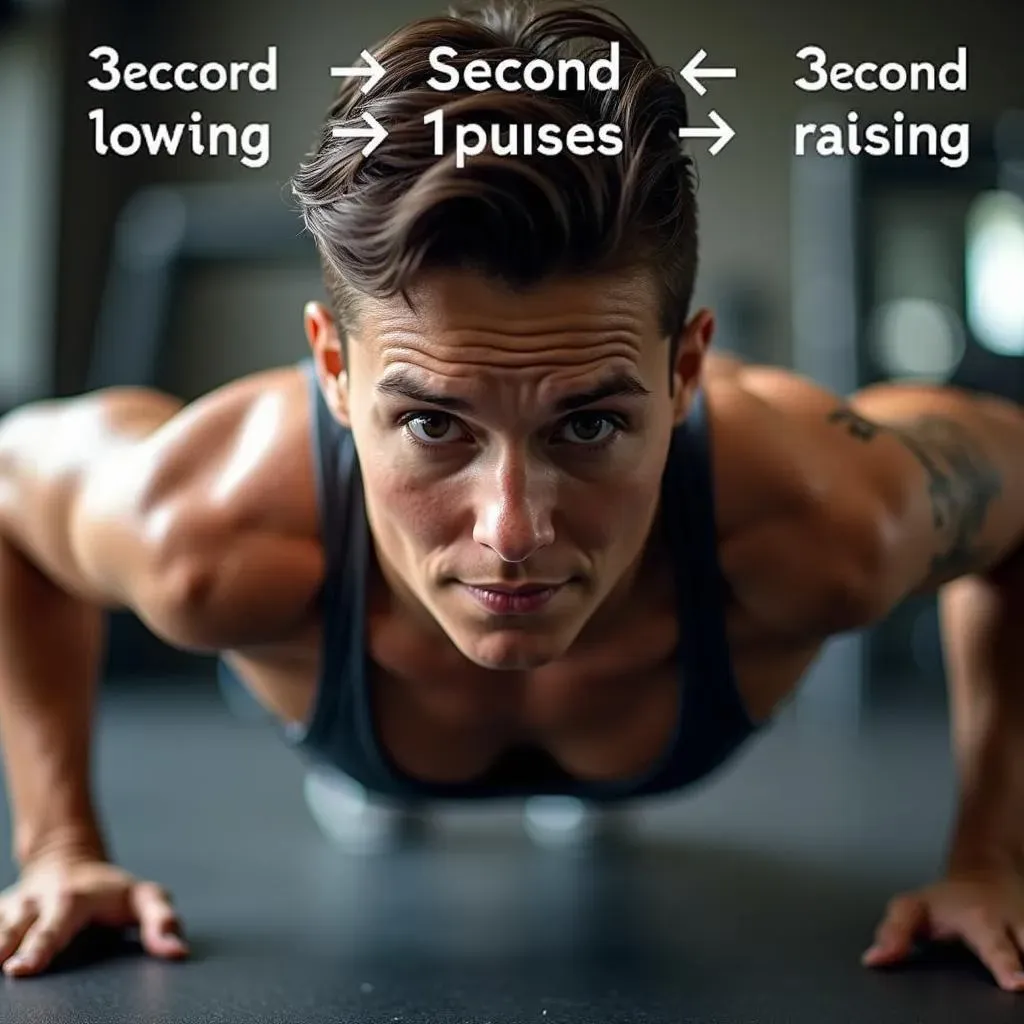
Adding Time Under Tension: The Slow and Controlled Approach
Once you've mastered perfect form, it's time to crank up the intensity. One of the most effective ways to do this is by increasing the time under tension. This means slowing down both the lowering and raising phases of the push-up. Try counting to three as you lower, pause for a second at the bottom, and then count to three as you push back up. This seemingly small change dramatically increases the challenge and forces your chest muscles to work harder. You'll feel the burn like never before!
Don't underestimate the power of slow and controlled movements. This technique is particularly effective for building muscle mass and strength. As you get stronger, you can increase the count or add more pauses to further increase the difficulty. For more advanced variations, consider exploring plyometric push-ups, which involve an explosive upward movement. For even more ideas, check out our guide on chest workouts for men.
- Slow lowering phase (count to 3)
- Pause at the bottom (1 second)
- Slow raising phase (count to 3)
Unilateral Loading: One Arm at a Time
Ready for a real challenge? Try unilateral loading – performing push-ups with one arm at a time. This dramatically increases the difficulty and forces your chest muscles to work harder to stabilize your body. Start by placing one hand behind your back, and perform push-ups with the remaining arm. You'll be surprised how quickly you feel the burn! Remember to alternate sides to maintain balance.
Unilateral loading is a fantastic way to build strength and stability, and it also helps to address any muscle imbalances you might have. If you're struggling to perform a full unilateral push-up, start by placing your free hand on your hip for support. Gradually reduce the amount of support as you get stronger. For additional exercises and routines, check out our best chest workout at home guide.
Variation | Difficulty | Chest Emphasis |
|---|---|---|
One-arm push-up (full) | Very High | Unilateral chest activation |
One-arm push-up (assisted) | High | Unilateral chest activation |
Plyometric Push-Ups: Explosive Power
Want to add some explosive power to your routine? Plyometric push-ups are the way to go! Perform a regular push-up, but instead of slowly returning to the starting position, explode upwards, lifting your hands off the ground for a moment. This dynamic movement is fantastic for building power and explosiveness, and it's a great way to challenge your chest muscles in a new way. Just remember to land softly to avoid injury.
Plyometrics are advanced techniques, so make sure you've mastered the basics before attempting them. If you're unsure about your form, start with easier variations and gradually work your way up. Safety should always be your top priority. For beginners, we recommend starting with standard push-ups to build a solid foundation. See our guide for beginner chest workouts at home to get started.